
HTTPS at Home: Securing My Homelab with Route 53 and NginxProxyManager
This week I took a big step toward tightening up my homelab: I added HTTPS to all of my internal services, using a wildcard certificate from Let’s Encrypt. The best part? I didn’t have to expose anything to the internet to make it happen.
I’ve been running Nginx Proxy Manager in both my dev and prod environments for a while now, mainly as a reverse proxy to keep my services cleanly accessible. But I’d been holding off on SSL—until now.
Why Bother with HTTPS Internally?
Sure, the homelab lives on a private network, but using HTTPS makes everything feel a bit more polished and secure. No more browser warnings. No more self-signed cert errors. And it’s one step closer to “production-grade,” which is kind of the point of all this tinkering.
Making It Happen
I already had a domain set up in AWS Route 53 (iworksometimes.com), so I figured I’d put it to good use. Here’s what I did:
- I created an IAM user (
npm-route53) and gave it permissions to manage DNS records in Route 53. - Then I installed the
certbot-route53plugin on the NPM host:
sudo pip install certbot-route53Inside NPM’s SSL section, I plugged in the IAM credentials and requested a wildcard cert for *.iworksometimes.com using the DNS challenge method.
NPM handled the rest. It used the IAM credentials to create a temporary DNS record, validated the domain with Let’s Encrypt, and applied the cert automatically. No need to open up port 80 or 443 to the public.
Here’s a peek at the SSL screen in NPM after the cert was issued:
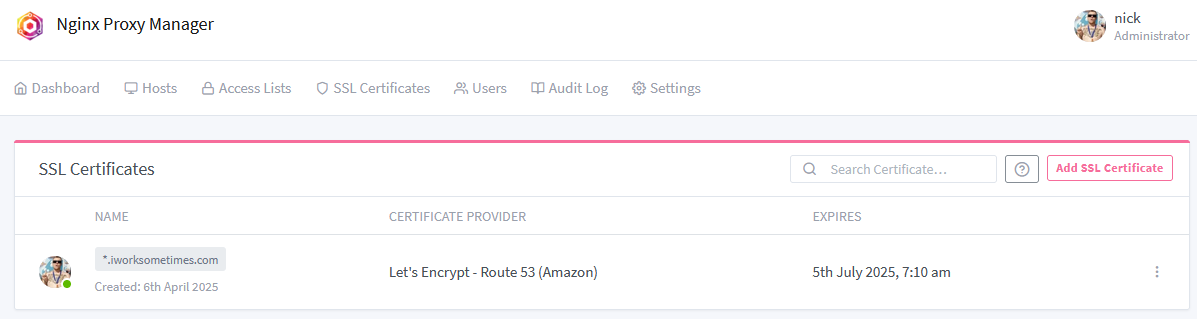
Now every internal service I’ve proxied through NPM is automatically covered by HTTPS. Clean, secure, and maintenance-free thanks to auto-renewal.
A Small Change That Feels Big
It’s a small improvement, but it makes the whole homelab feel way more polished. It also opened the door to using internal-only services like Vaultwarden or pgAdmin with proper encryption—something I’ve been meaning to do for a while.